
Fall Grain Stripe Box

If you have some old wood boxes laying around or find one at a thrift store, I’m going to show you how to repurpose them into some beautiful vintage inspired Fall decor!
If you prefer to watch the full tutorial and check out some other Fall pieces I made, you can watch the YouTube tutorial here: https://youtu.be/Kjqo2o8NpAk

I started with this old wood box I had in my stash. A deeper box will work best for this, but you can customize the design if you have a shallow box instead.

I started by lightly sanding my box since there was a shiny sealer on mine. I sanded just enough to take that shine off so my paint would adhere and I removed the latch on the front and sat it aside. I painted it with two coats of Waverly White chalk paint.

After it was completely dry, I went around the edges and corners with a fine grit sanding block to distress it.

I wanted to add some grain stripes to my box so I just used some painters tape and spread it out where I wanted my stripes.

I taped my box all the way around from the back to the front and decided on 3 stripes for mine, but you can do your grain stripe pattern with more if you wanted.
Usually I like to “seal” my painters tape so that there are no runs under the tape by simply doing a layer of the undercoat paint on top of the painters tape (in this case it would be a layer of my white paint on top first), however, I forgot to do that this time.

Instead, I went straight in with some burnt orange acrylic paint that I mixed up using a combination of apple barrel paint (Red barn & King’s yellow).

I painted the burnt orange color just between the painters tape and ended up doing 3 coats since my acrylic paint is thinner. After I finished the 3 coats, I removed the painters tape before the last coat dried. I did have a few paint bleeds since I forgot to “seal” my painters tape, so after it was dry, I went in with a tiny paint brush and my white chalk paint to fix some of the noticeable bleeds.
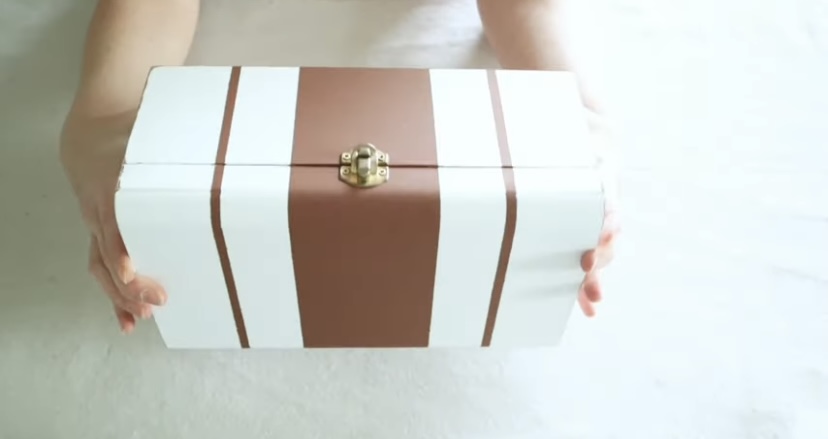
This is how it looked once my paint was completely dry. I replaced the latch on the front before moving to the next step so I would know where to place my words without the latch covering them.

I used some alphabet stamps that I got from Amazon with my archival black ink stamp pad (this ink dries fast and is permanent so it works well on any surface!).
I had seen an old pumpkin seeds grain sack at an antique shop so I had the idea to make this a pumpkin seeds box. I used my stamps to put “Pumpkin Seeds, 50 cents per pound” on the front of my box.

I didn’t have a stamp with the “cents” so I used a “c” then just added the slash with my black marker.

On top of my box, I added a pumpkin stamp in the center with another stamp I got from Amazon.

There was also a wheat stem stamp on that same sheet of stamps, so I made a little wreath around my pumpkin using that one.

Here is the end result! I added some small white pumpkins inside my box to decorate with it for Fall, but it’s also just as cute, left closed so that you can also see the top part!


Comments
Post a Comment