
DIY Tic Tac Toe Tray

Create this beautiful Tic Tac Toe Tray with just a few simple steps! You can watch the video here if you’d prefer:

I started with this sign I found at my local thrift store because I thought it would be perfect for this project. You can use any sign or tray for this though!

It had some wording on it so I sanded it down a little bit and then I gave it two coats of a deep brown acrylic paint.

Once the brown paint was dry, I used a dollar store little pillar candle and rubbed it along the edges and in random areas that I wanted to look chippy.

I then painted over the entire board with two coats of white chalk paint.

I let the paint dry and then used a little scrapper to go over the board. In the areas where I had rubbed the candle over, the paint chipped off and gave it an aged/worn look.

Since my board was rectangular, I wanted to center my tic tac toe board and make all the sides the same length. I used a piece of paper and ruler to make a template for where my lines were going to be.

I used a pencil to make small dots onto my board where the lines ended on the paper.

I found this vine stamp at Dollar Tree and decided to use it for the lines on my tic tac toe board.

The stamp was almost the perfect size to make the lines just stamping each twice. I had to use the end of the stamp to finish the lines.
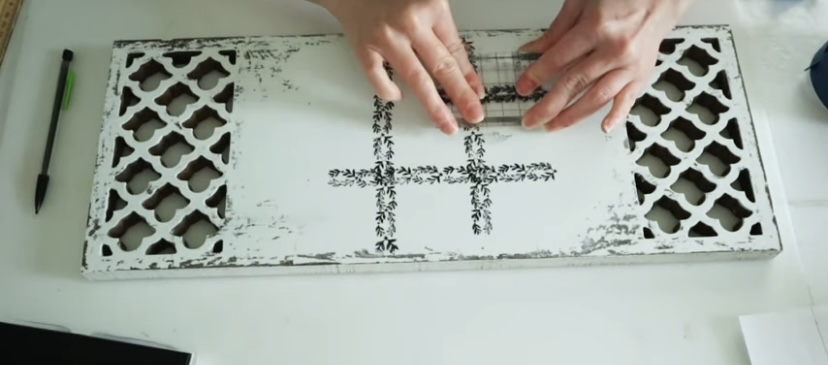
To stamp each line, I just lined it up with the dots I made.

I did want to also make this into a functional tray for drinks and such or just to have on the table or porch so I sealed my tray with 3 light coats of Aileen’s acrylic sealer then added some old cabinet pulls I got from a thrift store to each side.

I didn’t like the copper color of the handles so I used some rub n buff to make them gold.

Now for the actual game pieces. I found these little square blocks in a bag at the thrift store and I believe they’re children’s building blocks, but you can get pieces like these on Amazon or at the craft store.

I painted all the pieces with the same brown color I used on the board/tray.

Then I watered down some white chalk paint and brushed it onto the wood pieces, wiping the excess off with a paper towel. This combination of white washing over dark brown gave my pieces a pretty gray barn wood look.

Instead of the typical X’s and O’s, I decided to use some bee stamps I found at Dollar Tree and some Butterfly stamps I got from Amazon. Bees vs Butterflies.

I also sealed all of the game pieces too.

Then for the final touch I added one more stamp to the center spot of my game board/tray. That was it!


Comments
Post a Comment